Livingroom Makeover
Painting the Walls and Ceiling
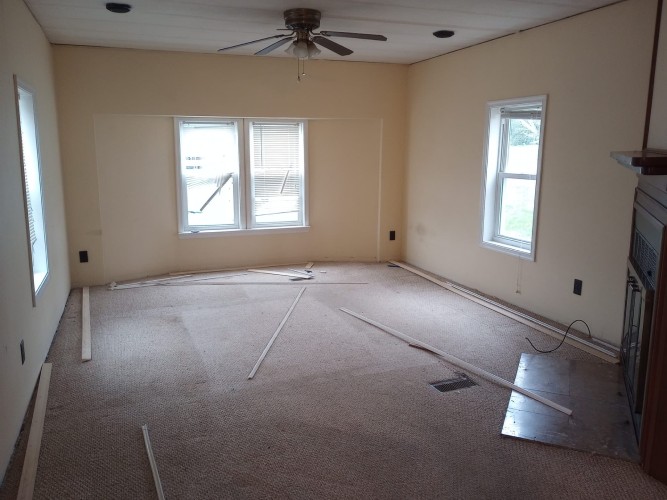
The first thing I did was remove the white baseboards and ceiling trim, I planned one reusing them, so I saved them. They were pretty easy to take out, using a scraper to get between the wall and baseboard, sometimes a box cutter to slice the caulk. The nails were really long though and some stuck in the walls after wards, and I would that quickly yanking them out with the hammer damages the wall less than slowly.
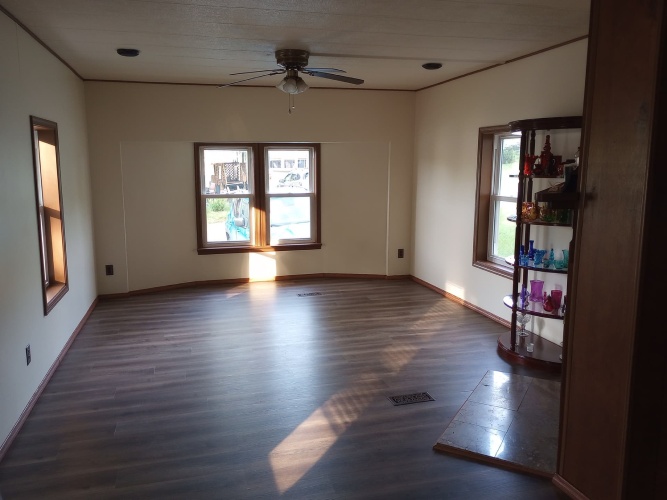
I had wahsed the walls and celing a few weeks earlier, but could not get the dingy stains off the walls (which is a problem with matte/flat paint), so I decided I would paint them. I chose an eggshell ivory color (eggshell is between matte and satin, since I wanted it to be more washable than flat, but not shiny). It was not as warm and yellow as the orginal cream color, but I was impulsive and didn't feel like taking the paint card home to compare and then going back.
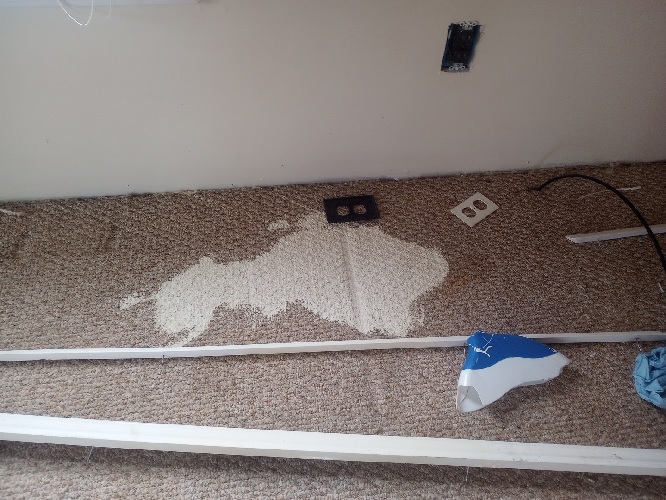
The paint went on easy despite it being the cheepest option with no primer, but I attribute that to the original walls being matte, thus not slick. I did two coats for each wall. I ended up painting the celing too because it was a paler colder white than the walls, even compared to my ivory, and it was discolored in a few places. It needed more paint due to more texture, but it turned out well! Unfortunately I forgot about roller handle extentions so I did the whole celing while standing on a ladder. My paint fell off my ladder at one point and spilled all over the carpet, which would have been a tradgety if I planned on keeping the carpet, but it was okay because the carpet was old, dingey, and torn in places.
The Floor
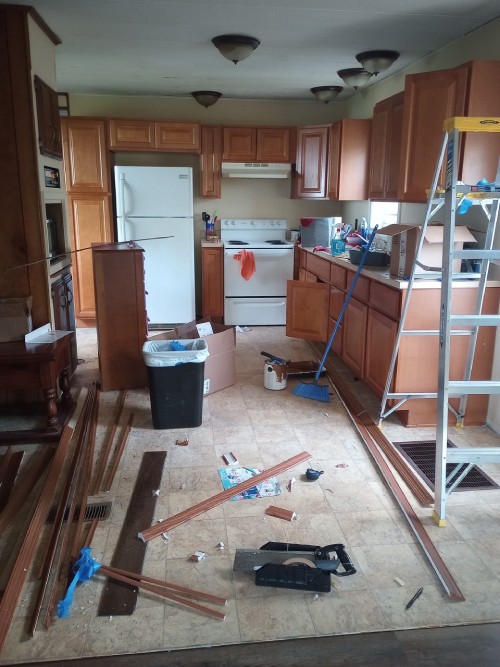
My parents helped me tear out the old carpet, the foam underneith, and the tack strips. The carpet and foam came out easy, but the tack strips were put in with a shittonne of nails and long staples, making them mush harder to extract. Thank god for help. After that remaining staples from the foam padd were removed and the floor was swept. One thing to note about mobile homes, especially if they are older like mine, is that the subfloors Will be uneven. New carpet would have been an ideal choice to deal with that, but I didn't think I could put new carpet in myself, especially with the vent holes.
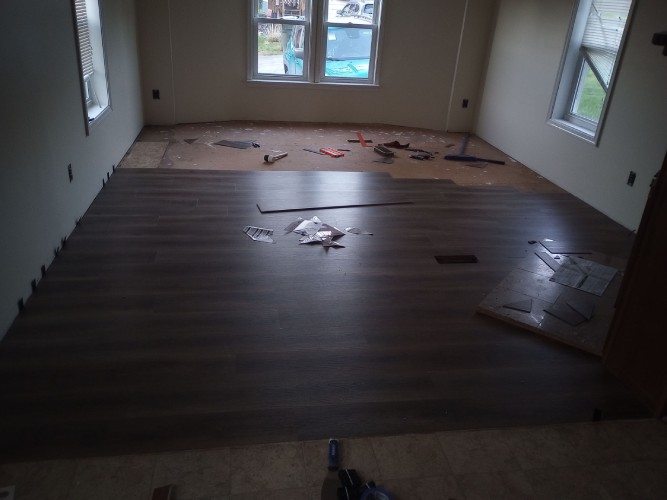
Instead I shopped around for vinyl plank flooring as an affordable option (ideally real wood because it is so pretty but I'm on a budget). I really wanted a warmer smoother toned wood patterned floor, as the one I eneded up with is greyer and varies a lot in shade, but I was limited by price and quality. I ened up choosing the one I did because it seamed really good quality for its price (1.89$/sqft). There was very pretty laminate planks for 97c/sqft but it was not waterproof, even going as far as to say not to mop it because it could get water damaged through mopping... But this one was durable, thick enough to be sturdy but not too thick, allowing me to cut straight edges with a box cutter, and had interlocking edges so I wouldn't have to use any adhesive.
For complicated cut edges I borrowed my parents jigsaw. The very end next to the wall was also difficult because you have to interlock them. Note that I left a few mm of space between the wall and floor so as a floating floor it would have room to expand and contract with temperature. The baseboards will cover these gaps.
I was halfway through painting the old baseboards and ceiling trim before realizing I wanted to get new baseboards since the original were a little beat up and gunked up with caulk. That was a good idea since the paint would have gotten scraped up on the baseboards. I thought about staining some baseboards, but there were cheeper lighter fake ones with a fake wood pattern, so I got those. I also got matching quarter round to go around the fireplace and the ceiling. Those were relatively easy to do with a miterbox borrowed from my dad, but the corners under the bay window were not close to 90 deg so I had to wing it with a protractor.
I honestly can't remember if I painted the window trim before or after putting in the baseboards and ceiling trim, but I painted them a warm brown to match the wood. I didn't like how they and the original baseboards were pure white on the cream walls. I felt the brown would make the room feel warmer and more structured. Unfortunately the paint scratches off of the window very easy, so I probably shoulw have sanded and/or used primer first. I had the same problem with my front door (painted the same color) but I was able to fix it with a waterbase matte wood sealer. I'd like to do something similar for the windows, but I dont want it to be matte since that will be difficult to clean (but I also don't want glossy either).
Thats it for now! I'm in the process of getting/hanging lace curtains! I'd also like to get a few dark wood colored bamboo blinds to replace the white miniblinds I have since I hate white miniblinds (and they get broke easy). I also bought a new recliner and loveseat from Biglots, cheeper than most places, but still the most expensive set of anything I've bought for the house, but I'll have to wait a while for the order to come in. They are brown and very cushy. I hate couches that have hard rectangular armrests, these ones are the soft wide cushiony kind. I also have some thrifted wood side tables that I'll put in when I have the couches >:3